
Mossimo Dress Hack: Crocheted Bodice How-To

Yesterday I posted a recap of the Cotton-ish Market Bag #joannCPAL, so today I thought I’d show you how the very same Mesh Stitch used to make that bag can also be translated into a cool (both literally and figuratively) bodice on a fabric dress.
Here in the states, Target is a go-to shopping spot for stylish yet affordable wardrobe pieces. They’ve been pretty brilliant about staying on-trend by licensing great brands, and working with independent artists to create a slew of dynamic, wearable pieces. Surf brand, Mossimo was one of the earlier companies to pair up with the retail giant. Growing up in Southern California, Mossimo was a big deal. It’s one of the brands that the “cool kids” wore. It was a bit expensive though, and we were pretty broke. Alas. Since then though, the brand had become exclusive to Target making it accessible for most. Yay! Accessibility however, means that you’re likely to not be the only one you know wearing that cute dress with the great print.
Well, my friends, that’s were this post comes in. It’s quick(ish) and easy to personalize an existing garment and I’m going to show you how to do-it-yourself with my very 1st, Mossimo Dress Hack tutorial!
MATERIALS
Dress
Scissors
Disappearing Ink (or regualar) Pen
Measuring Tape
Sharp, Tapestry Needle
Straight Pins
Sewing Machine, Needle & Thread OR Fusible Hem Tape & Iron
1 Ball, Bernat Cotton-ish by Vickie Howell (or similar weight, cotton blend yarn)
Size US G/6 (4 mm) Crochet Hook
CROCHET ABREVIATIONS
ch = chain
sc = single crochet
hdc = half double crochet
HOW-TO HACK

- This is the fun part. Go shopping either at a store or in your own closet! For this project it’s helpful to use a dress that doesn’t have a neckline any lower than a scoop neck.

- This is the scary part. It feels so wrong to cut a perfectly go dress, doesn’t it? I suggest holding the dress up to yourself before you make the cut. If you don’t want the crochet mesh to start mid-bustline, then make sure you cut right under the neckline (maybe a little higher if you’re working with a crew neck.) Don’t worry though, you’ll probably wear a tank top or vintage slip under the mesh anyway, so no biggie if you cut too much fabric off. I believe in you!

- Even though hemming is not my favorite thing in the world to do, for a dress hack like this one it’s really important. Not only does it keep the raw edges of the material from fraying, but the folds offer additional layers of fabric for stabilization. Your hemline doesn’t need to be perfect, nor does it matter what seam allowance you use. Whatever’s clever. If you don’t own a sewing machine, hand-sewing or iron-on fusible hem tape will get the job done, too. Make sure though, to hem both back and front pieces of your dress!

- Using a measuring tape as a guide make an odd amount of dots about 1/4″/.5 cm from the top edge and 1/2″/1.25 cm apart from each other. These dots will act as your hand-sewing guide.

- Using a strand of yarn, a tapestry needle and the blanket stitch, sew a foundation edging along the hemlines where the dots have been marked. You’ll end up with an even number of gaps in between the stitches. Those gaps will be what you crochet your first row into.
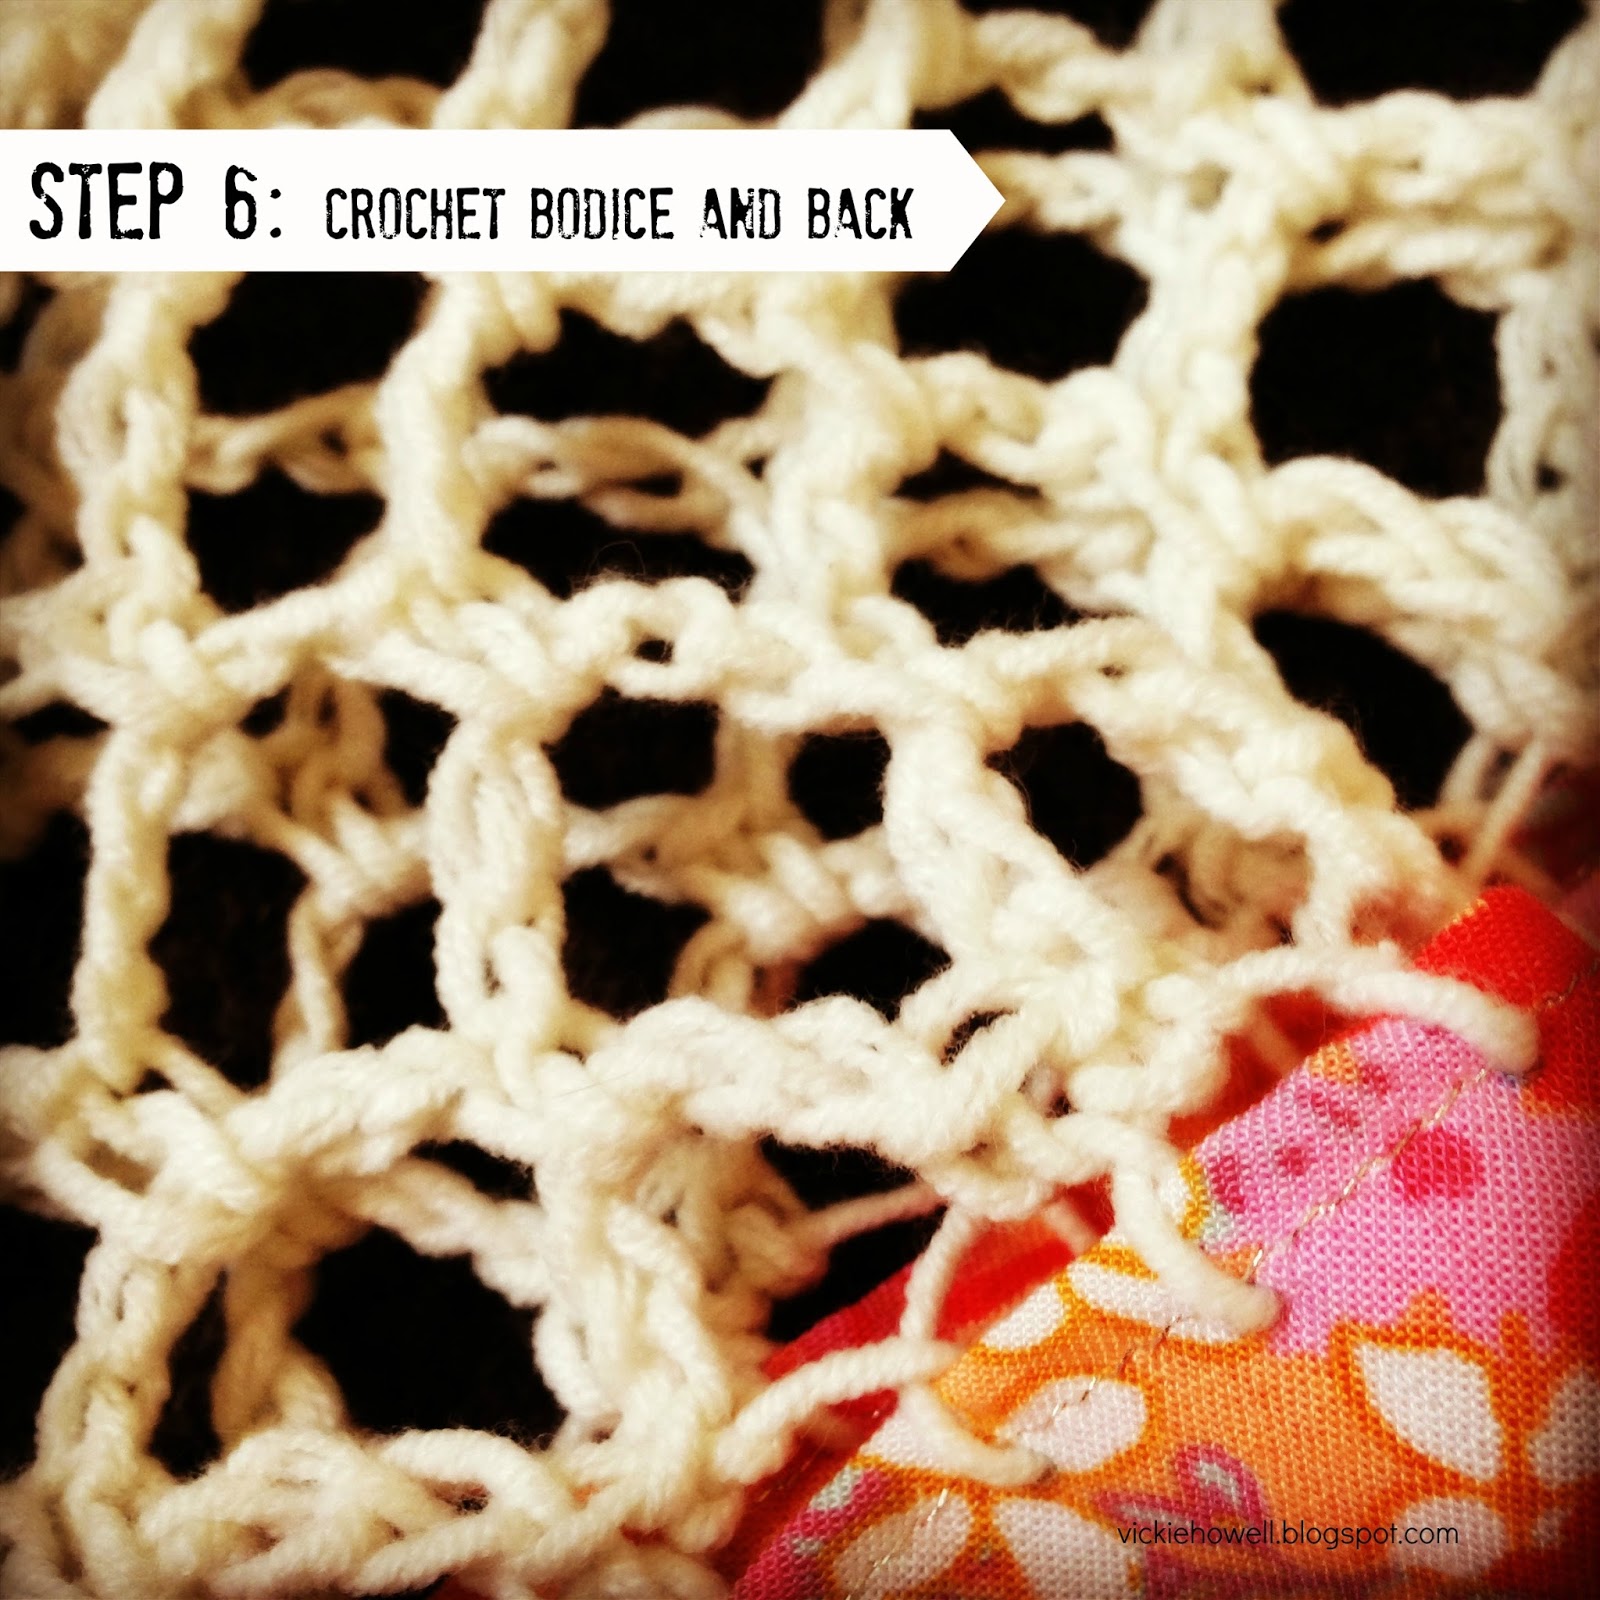
- This is the hook of the project (har, har, har)! Join yarn to piece to the right side of your front piece by pulling a slip-knotted loop through the first gap on the right-hand side.
- Row 1: Ch 6 (counts as sc and ch 5), sc in next gap, *[ch 5, sc] in next gap, sc in next gap; repeat from * to end. Turn.
- Row 2: Ch 5. 1 sc in next ch-5 sp; rep from * to end. Turn.
- Repeat Row 2 for as many times as necessary to reach where you’d like the neckline to hit (for me, that was 10 more times). For this project I suggest working until right about at the bottom of your clavicle bone (keep in mind that there isn’t any shaping, so this will have a boat-neck fit.)
- Next Row: Ch 2, *4 hdc in ch-5 sp, hdc in sc; rep from * to end. Turn.
- Next Two Rows: Ch 2, hdc in next sc and every sc to end. Turn.
- Fasten off.
- Repeat all steps for for back piece.

- Using your preferred method (I used sc), seam together what will become the shoulders. The width of shoulders will vary based on your own body type. I have narrow shoulders so my neckline needed to be a bit smaller, so I seamed more than someone wider shoulders might. I’d say about 4″-5″/10 cm-12.5 cm for each seam should suffice.

- Weave in ends.
- Wear it!
Do you have a dress hack of your own to share? I’d love to see it! Post a photo on my FaceBook page or tag @VickieHowell on Twitter or Instagram.
Happy hacking!
xx,
Vickie


Liked you the first time I saw you’re bit in Knit simple mag! Bought your book, Step it up knits, and the yarns you use! I’m not your typical grandma, try to stay stylish and in the know! Am going to enjoy watching your show! Mel
Thanks for the support!