Project Flashback: Bunny Bots
BUNNY BOTS
MATERIALS
Grey Felt
Poly or Bamboo Stuffing
Sewing Machine & Grey Thread
Fashion Graffiti Fabric Paint Tagger (in either color: Soho, Merge or Taxicab)
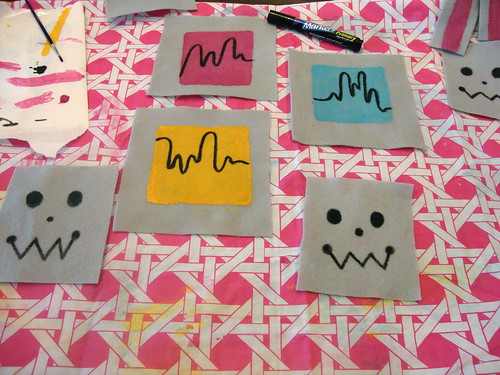
- Cut front & back pieces for the head, body, legs, arms & ears (see photo below for examples.)
- Use Fabric Paint Tagger to color in the center of the front ear pieces, and a square on the front body piece. Let dry.
- Use Fabric Marker to draw a robot-y face on front head piece and the frequency modulator line on the body front.
- Using needle & floss, embroider detailing on the body & eyes (optional).
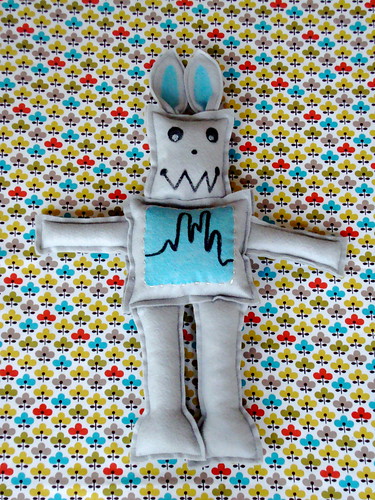
- Sew Bunny Bot together using a top stitch & 1/4″ seam allowance; stuffing all pieces (except the ears) as you go along.
Blue Bunny Bot
Pink Bunny Bot


Vickie, these are really a lot of fun! What a great idea!
CUTEST! ROBBITS! EVER!
Another fab project, Ms. V.
Cheers,
Madge
ooh, i think i now know what a certain 5 year old boy is now getting in his easter basket. thanks!
Oh, I love this Vickie! My 2 1/2 yo daughter is obsessed with robots, this would be perfect to add to her Easter basket.
How cute are those???? Does your brain ever shut off? 🙂 Keep up the good work.
Wow, great Easter gift for my “nerdish” friends! Thanks 4 sharing!
Robbits! So cute!
I’m totally making one for my son’s easter basket! Thanks!
Ooooh that is the perfect idea for use with the bunny eyes I came across at the thrift store last week! OOH yeah! I see me making a few of these for Toy Society drops in the next week or two! Thanks for the idea!!
soooo cute Robbits….
Responsibility quotes quotes
really very cute Robbits,i want to make a one for my fiends.
Hi. Am making these for Easter. Could use some more specific sewing instructions… For example, do you sew and stuff the limbs first and then attach to body? Any details would be much appreciated. Thanks.