
I love to Create: Oilcloth Covered Chairs

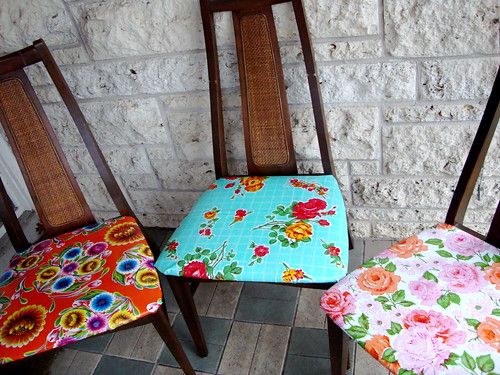
A couple of years ago when our family scored a vintage dining set for our kitchen, I re-covered the traditional looking chairs with a more mod-style fabric. Oh, how I dug the result! They were funky, they matched our house perfectly and completely transformed the look of the original set.
Alas however, using plain fabric (even heavily coated with Scotch Guard) in a kitchen that’s regularly inhabited by 3 kids and 2 pets, could possibly have been the worst idea ever! Ever. The chairs are constantly getting stained and have taken on a overall, dingy appearance that makes me cringe every time I look at them.
2010 is going to be about making more realistic choices for myself, even when it comes to home decor. New chairs for a new year, that’s what I need! So fair readers, I’m embracing the fact that I need to be able to easily wipe spilt food, cat hair and various unknown substances off of our seats; quickly and with relative success. I re-covered them (again) with oilcloth, a fabric that’s been treated with plastic.
Here’s how you too, can breathe new (and easier-to-clean) life into otherwise tired chairs!
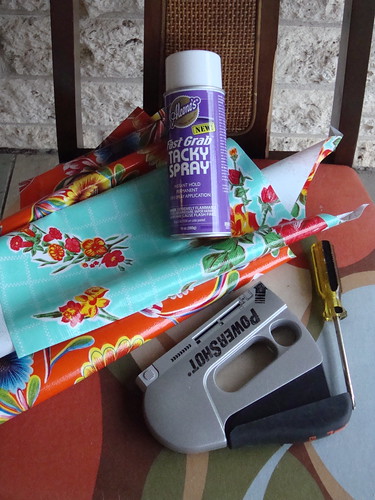
Materials
Chairs with Removable Seats
Oilcloth (available online) or Vinyl
Staple Gun & Staples
Pen
Screwdriver
Scissors

Directions
- Unscrew & remove seat from chair.
- Use seat as a template by laying it on the oilcloth and drawing around it, adding about 3″ to all sides.
- Spray an even layer of Fast Grab Tacky Spray onto the old fabric of the seat top. Center seat face down on the wrong side of the oilcloth, pressing firmly so the glue sticks. This will prevent it from sliding around while you staple.
- Working from the center out of any of the edges, staple oilcloth to seat wood. Since this fabric doesn’t have much give, you’ll have to pleat in several places to keep it taut. When you get to the corners, fold as if you were wrapping a present.
The key to successful seat covering is using lots of staples to withstand wear & tear. Don’t worry if it isn’t pretty; no one but you will see the seat underside.

- Depending on where the screw holes are, you may end up covering them. If so, you can poke through the oilcloth with a craft knife or nail to access them again.
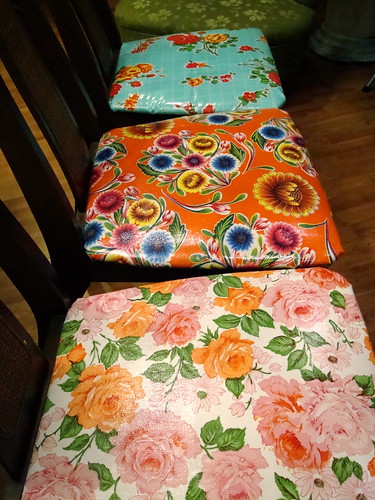
- Re-attach seat to chair.
Repeat for all of your chairs, using either the same oilcloth or mixing it up as I did. If you’re not attached to the wood color take this project a step further, by painting the chair frames 1st!
Craft.Rock.Love,
Vickie


Hello Vickie,
This project is totally awesome and love the fabric prints!
Happy New Year!
~ Gabriela ~
I am digging the vinyl prints! No kids, but two St Bernards can mess things up pretty quick… thanks for the inspiration!
Mary over at Rewind Knits